So far, we have learned about controls that can be used to automatically set the value of an object or feature. Another option is to use decision tables.
To get to know how it works, we make some modifications to the knowledge base. We modify the Class Sigma Lighting equipment, which has already been created but does not yet have any content.
We consider that different lamps can be used for our product. Depending on the design of the lamp, different holders are used. And this also requires the assumption of different numbers of lamps. In addition, a power supply must be found to match the expected number and power of the lamps.
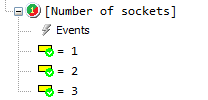
For this task, a feature [Number of sockets] of type Long is first applied, which should include the number of lamp sockets:
Next, we need a feature of string Lamps, for the possible selectable bulbs.
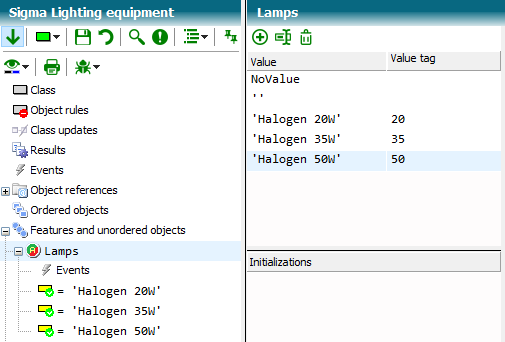
The feature receives ValueTag values in addition to the value. We need these to calculate the power requirements of the lamp.
Another feature Power of type Double is required to determine the power consumption:
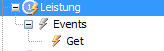
The Get event is filled with the following code:
Private Function Get(ByRef Value As Double) As Void
Value := Lamps.ValueTag * [Number of sockets]
End Function
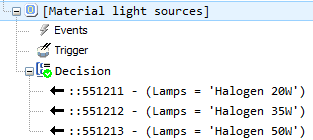
Now materials are needed, which are determined from the feature Lamps:
We create an object [Material light sources] from the Material class and use a decision to set the classes for the object.
Then we create another object [Material lamp holder]:

Now we have all the props together to get the class "to play". Moment, do you say, there is still no number of light sources and the number of lamp holders?
Here comes a decision table:
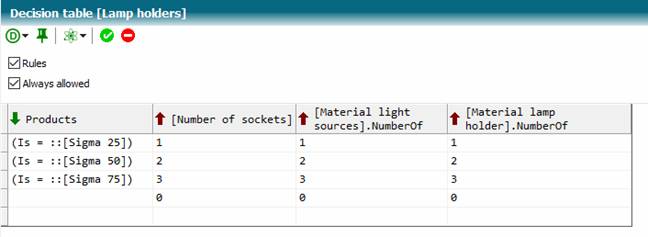
Multiple input columns and output columns can be defined. Double-clicking the header of a column specifies a control variable for each column.
In the [Lamp holders] decision table, an input column is defined over the Products object reference. The decision table checks row by row from top to bottom for the appropriateness of all fields of the input columns, i.e. whether the parent object is a Sigma 25, Sigma 50 or Sigma 75.
Suppose we chose a Sigma 50 object at runtime, then the field of the found row is processed in turn for each output column. The characteristic [Number of sockets] is given a value of 2, the feature NumberOf of the object [Material light sources] is given the value 2, and the feature NumberOf of the object [Material lamp holder] is given the value 2.
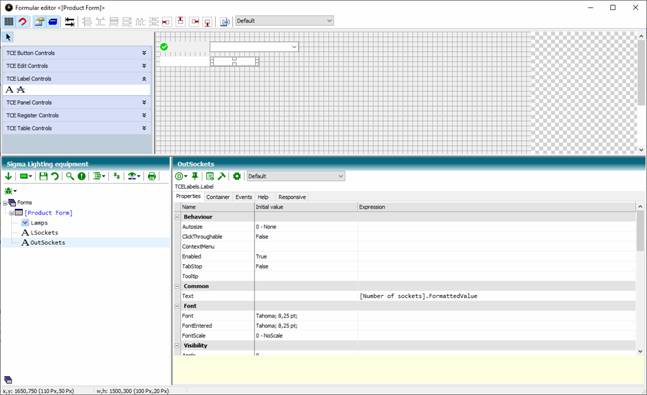
Now you can customize the form of the class Sigma Lighting equipment.
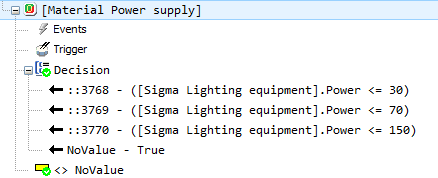
You can create the object for the required power supply for the lamp in the Sigma class.
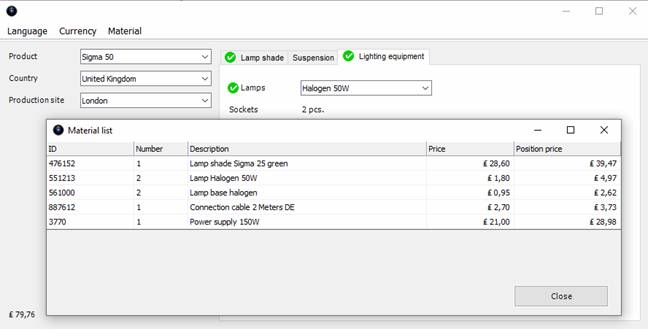
The result of your modification should look something like this:
(knowledge base Tutorial Stage 10)
 Contents
 Index
Index Previous
 Next
Next