If you start with TCE to develop, you should familiarize yourself with the basic mechanisms of TCE.
TCE is a simple object-oriented programming language with a hierarchical class structure with different mechanisms and useful types of variables allowing rapid application development.
In TCE, an application is denoted as a knowledge base.
A knowledge base has basic properties, as well as a class tree where you can store content of the application.
Knowledge bases can be edited in parallel by multiple developers. A reservation unit is a class. A class can be locked by user to change and the changes will be shared after work is done. Classes that are not locked are displayed in a gray color. Classes that are locked by other developers are displayed in orange. Own locked classes are displayed in green.
Before creating the first knowledge base, you must connect to a project to save the knowledge base into.
Open the Project menu of TCE.

Here you will find the symbol to manage the server connections.
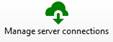
After clicking the symbol, a window for server connections is opening.

I.e., if you want to connect to the TCE server on your local computer, you must enter the parameters below.
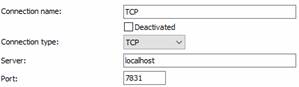
The item ‘Server’ can contain either the name of the server or it’s IP. The item Port should be 7831, the default TCP connection port for TCE.
Save your settings by clicking OK.
After that you must set the project folders of your server. Please select the server, which project settings you like to edit.
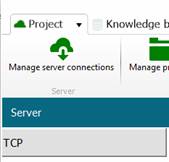
Select the icon Manage projects. The window for managing the project source is opening. Here you can enter locations (the main project directory) where the knowledge bases are saved.

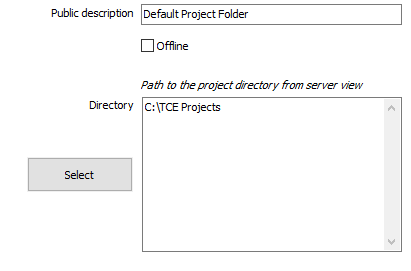
The directory to be chosen is entered by server view. This will be relevant if the server has no common shared directory for TCE projects.
On default your knowledge bases will be saved into the default project directory, which is
C:\Program Files (x86)\Common Files\TAP.CON\TCE\Projects
Save your settings by clicking OK.
If you choose the project, and there is no appropriate security file in this directory, the security settings for this directory must be entered.

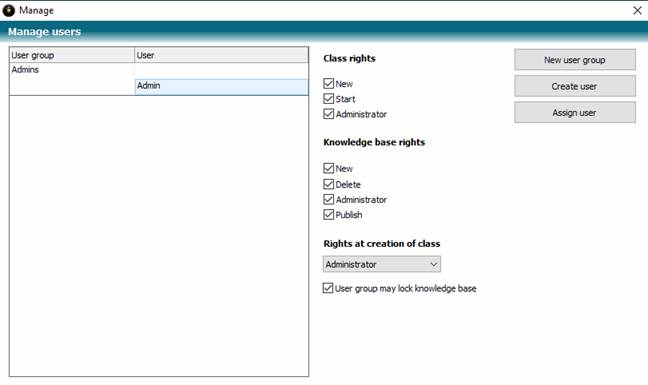
Try to enter a user group and a user as shown above. There must be at least one available user group and at least one user, with administrator permissions set.
Each defined group can have class rights and knowledge base rights. For an administrator it is the best choice to activate all the switches to ensure the knowledge base can be edited at all.
Save your settings by clicking OK.
Now you can select one project of the selected server. You will get Login window:
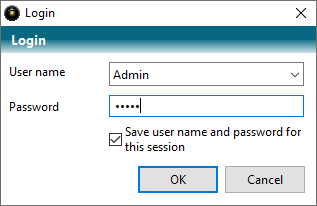
Enter the username and its password here.
If you like to create a new knowledge base, select the following symbol:

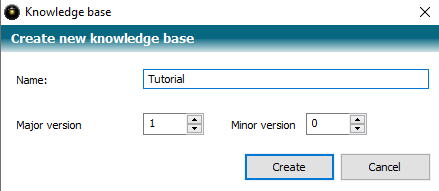
Enter the name of your new knowledge base and confirm with the button Create. Further on we use the name Tutorial for the knowledge base.
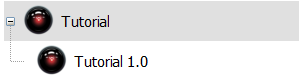
By double clicking the entry Tutorial the knowledge base will be opened.
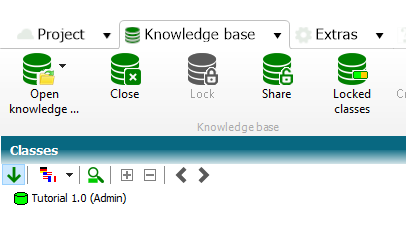
The symbol of the knowledge base is colored green. This means that the knowledge base properties are locked by the user.
When you like to share the knowledge base properties, you can select the menu item Share from the context menu of the knowledge base properties. After that, the icon is grayed out. Locking the knowledge base will reserve the properties of the knowledge base for editing.


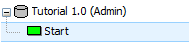
Now place the first class with the name ‘Start’ below the knowledge base symbol.
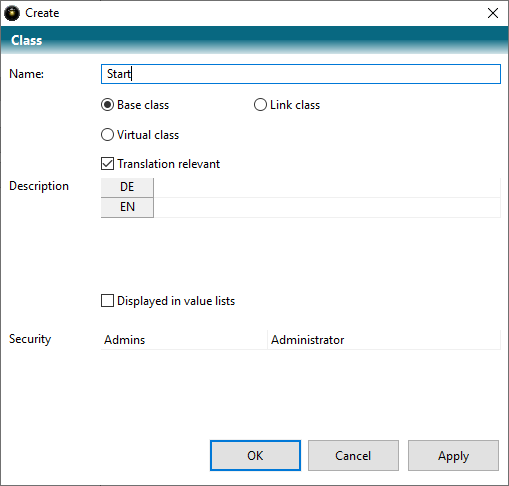
Enter the name of the class as shown above.
A class can contain elements for the use in your application.

You will see a list of different trailers for elements of the class in the left pane. On the right, you can see the corresponding properties to a selected hanger.
Now let's start filling this class with content.
Select the trailer Functions and double-click the text ClassInitialize on the right.
You will now receive the entry ClassInitialize on the left under the trailer Functions, and when you select, you will receive the function editor on the right.
Enter the following:
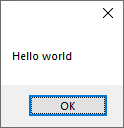
Function ClassInitialize() As Void
MsgBox("Hello world")
End Function
Now select Start Debugging from the context menu of the Start class.
Now the following happens:
1. An application TCE Client starts a process TCEX of the server in debugging mode.
2. The TCEX process reads the knowledge base Tutorial.
3. The TCEX process is instructed to start the Start class.
4. The process creates an object Start from the Start class.
5. When an object is created, the ClassInitialize function runs automatically if it exists.
6. The specified contents of the ClassInitialize function are processed from top to bottom in series. TCE encounters the MsgBox command, which displays an information window. Immediately before that, a so-called rule check is carried out.
7. TCE is waiting for the information window to be confirmed.
8. After confirmation, the program execution will continue, and the interpreter comes to the end.
9. A further check of rules is performed.
10. The server process detects that no more windows are displayed at the client and terminates itself and the client.
Steps 4-6 are essential for program development.
In step 4, you can see that classes are creating objects. This is done automatically for the start class when the application starts.
Step 5 describes that functions are automatically performed when you create objects (and also when you delete them).
In step 6, a so-called rule check is performed for the first time. Rule checks occur whenever windows are displayed at the client, or the interpreter returns to hibernation and registers that something has changed on the application's objects.
The result of your efforts is therefore
(knowledge base Tutorial Stage 1)
 Contents
 Index
Index Previous
 Next
Next